Active Attack Scenario: Compromised Employee Workstation
In this section, we will explore a realistic active attack scenario involving a compromised employee workstation. The purpose of this exercise is to demonstrate how UTMStack can effectively detect and respond to such attacks, ensuring the security of your corporate systems.
Attack Overview
In this simulated attack, an external malicious actor successfully executes a social engineering attack, gaining unauthorized access to a corporate device. The attacker’s objective is to infiltrate the corporate systems and carry out unauthorized activities. The attack unfolds in several phases, showcasing the attacker’s techniques and UTMStack’s capabilities in identifying and mitigating threats. The primary steps involved in this attack scenario are as follows:
-
Reconnaissance Attack: The attacker initiates the attack by conducting a reconnaissance phase to gather information about the target network. This phase enables the attacker to gain visibility and identify potential vulnerabilities.
-
Exploitation of Saved Credentials: Leveraging acquired knowledge, the attacker exploits saved credentials to gain unauthorized access to the corporate network. By compromising an employee workstation, the attacker bypasses initial security measures.
-
Modifying the Host File: To evade detection, the attacker modifies the host file, a critical system file used to map IP addresses to hostnames. By altering this file, the attacker can redirect network traffic and maintain persistence within the compromised system.
-
Creation of a Masquerading User: The attacker masquerades as a Windows update service account by creating a new user within the compromised employee’s workstation. This technique allows the attacker to establish a covert presence, making it harder to detect their activities.
UTMStack Alert Management and Incident Response
One common concern in incident response is the potential delay in detecting and responding to threats. However, UTMStack’s correlation capabilities ensure that detection occurs in near real-time, significantly reducing the time between the initial attack and response.
Upon accessing the UTMStack instance, you will immediately notice that it displays several alerts related to the previously executed network scan. This powerful feature enables security teams, such as a Security Operations Center (SOC), to efficiently manage and respond to potential threats.
Step 1: Access the Threat Management Menu
Log in to the UTMStack platform using your credentials. Once logged in, navigate to the Threat Management menu. This menu is the central hub for managing security-related Alert activities within UTMStack.
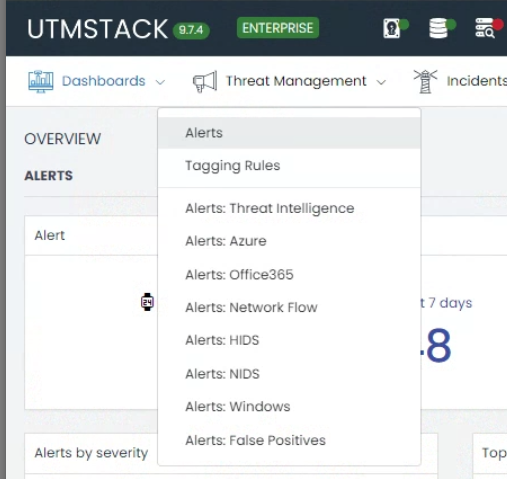
Step 2: Manage Alerts
Within the Threat Management menu, select the Alerts option. This section provides an overview of all alerts generated by UTMStack, including those related to the ongoing attack.
By accessing the Manage Alerts section, you can effectively monitor and respond to potential threats.
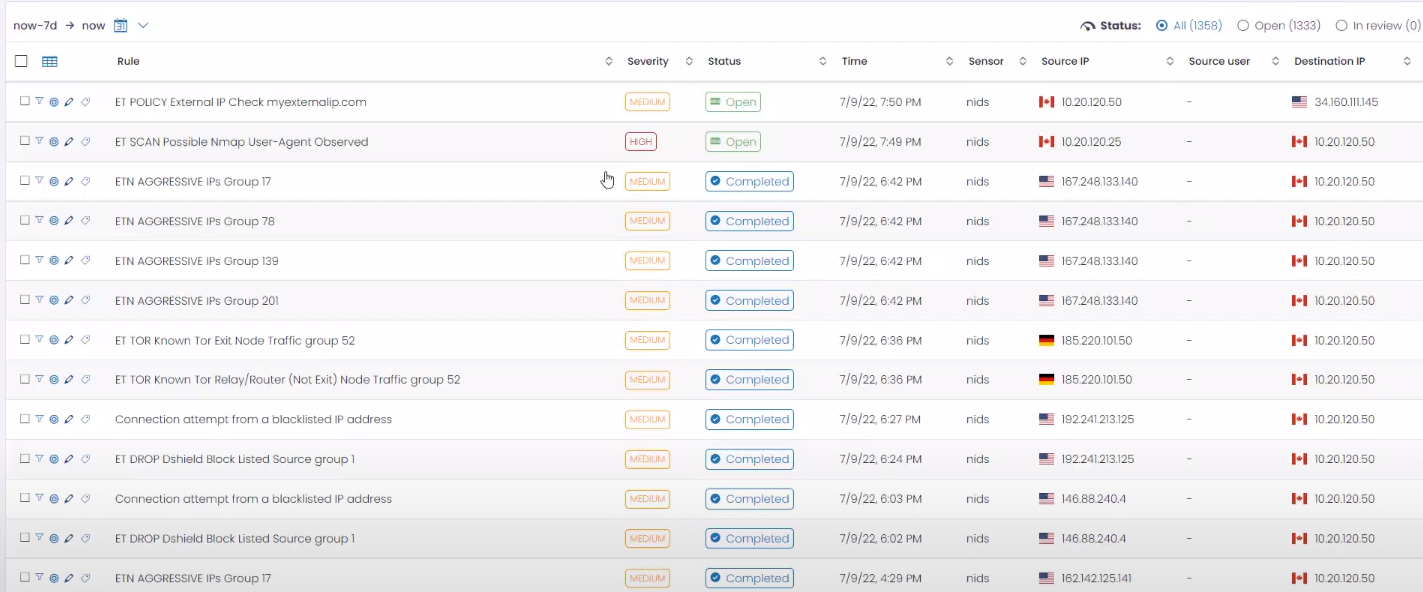
Step 3: Identify the High Priority Alert
- Scan through the list of alerts displayed in the “Manage Alerts” section.
- Identify the high priority alert associated with the active attack. This alert signifies a critical threat that requires immediate attention.
- Pay close attention to indicators such as severity levels, timestamps, and alert descriptions to prioritize your response
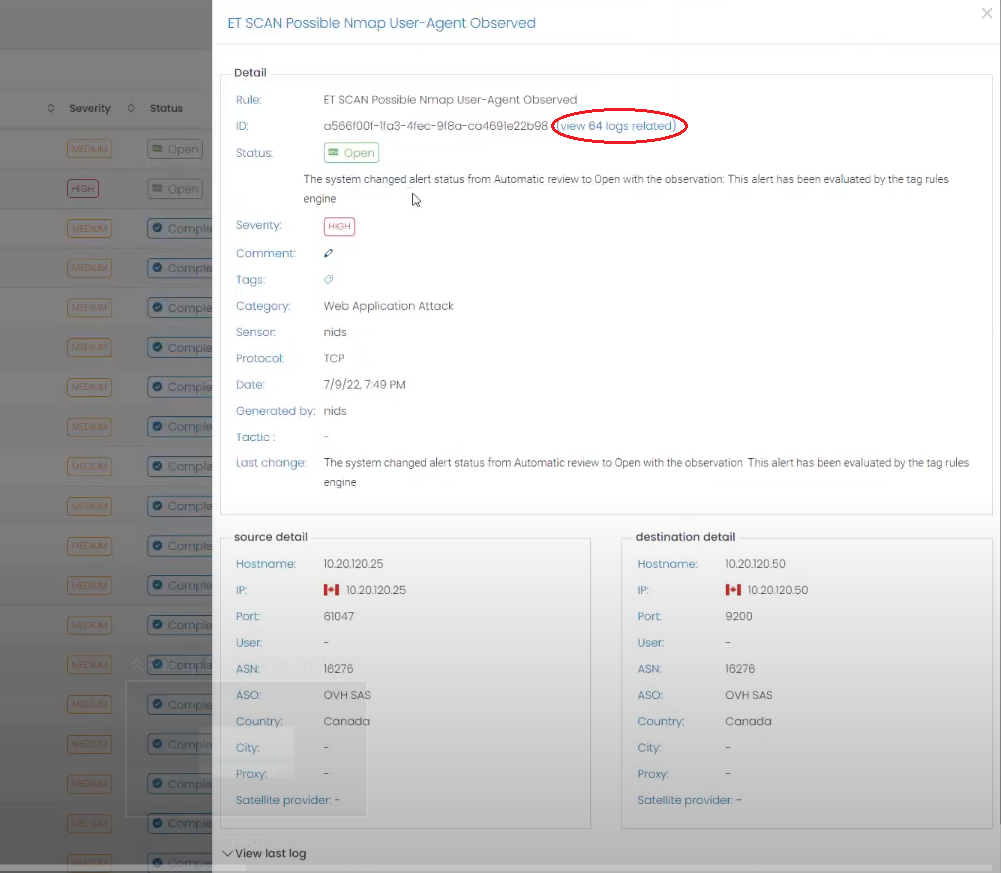
Step 4: View Alert Details
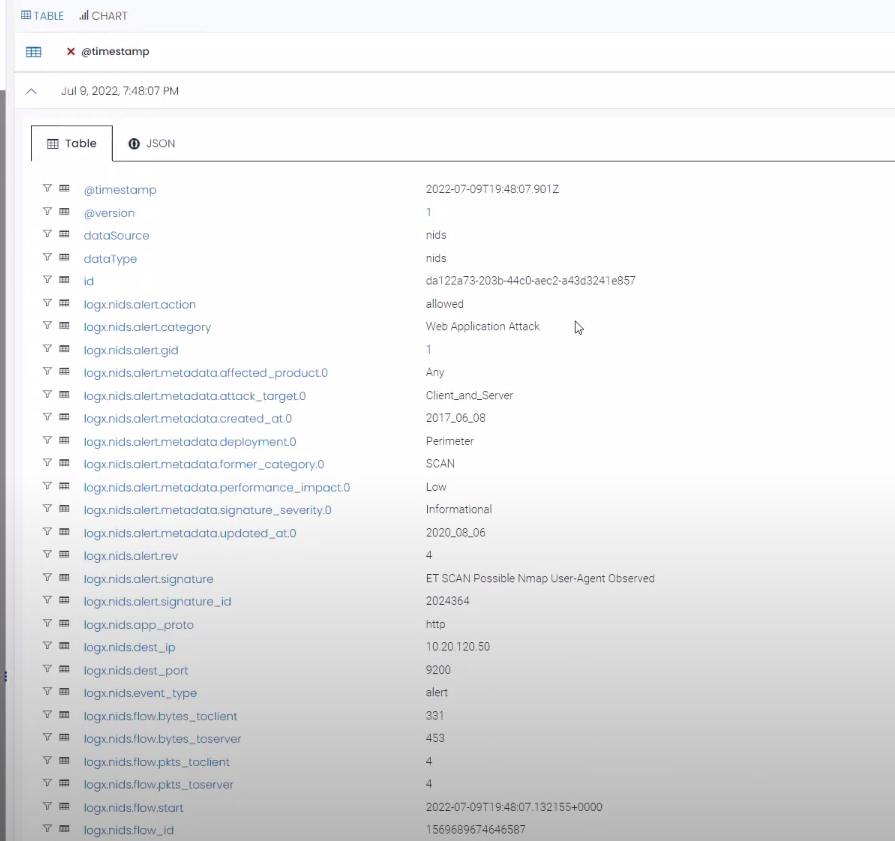
- Click on the identified high priority alert to access its detailed information. The alert details provide crucial insights into the nature of the attack, affected systems, potential impact, and related logs. You can access them to gather more information about the sequence of events.
- Analyze the information provided to gain a comprehensive understanding of the attack scenario.
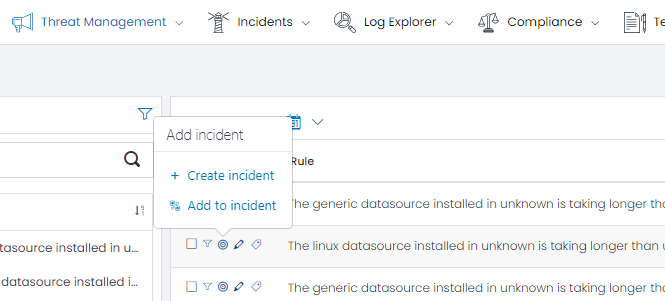
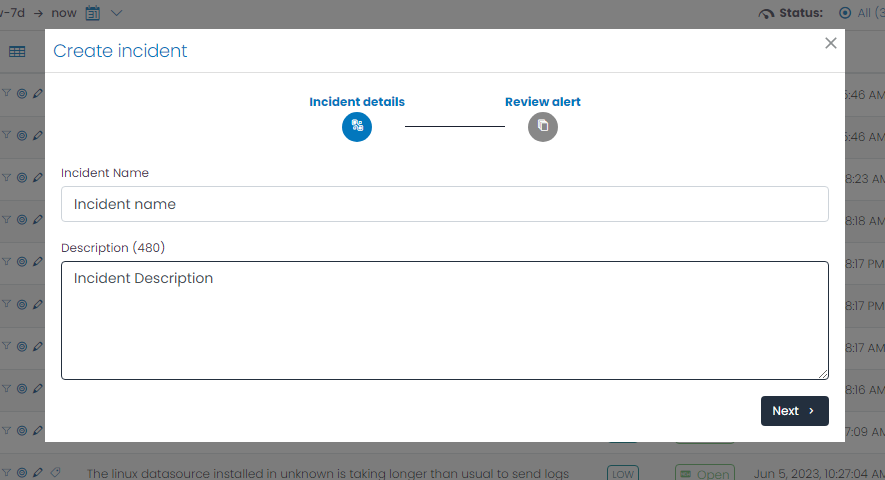
Step 5: Create an Incident
Based on the high priority alert, take action to create an incident within UTMStack. By creating an incident, you initiate a dedicated investigation and response process.
Follow the guidelines provided in UTMStack’s incident creation workflow to ensure accurate and comprehensive documentation of the incident.
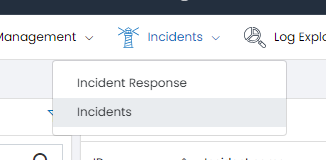
Step 6: Navigate to Incident View
Once the incident is created, navigate to the Incident View section in UTMStack. Incident view provides a centralized location for managing and tracking incident-related activities.
Go to Incident Menu and select Incidents:
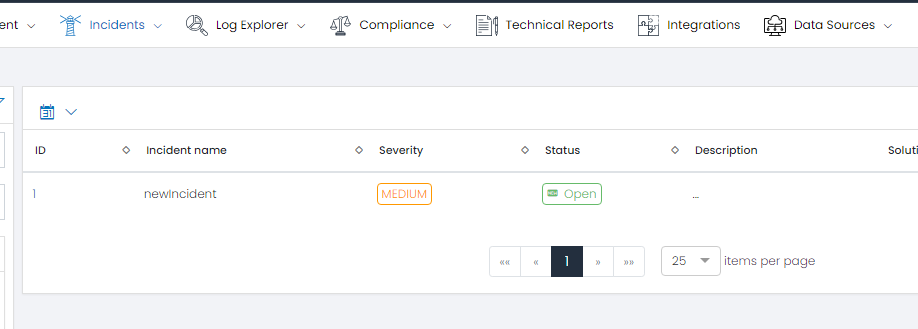
You will see the list of Incidents:
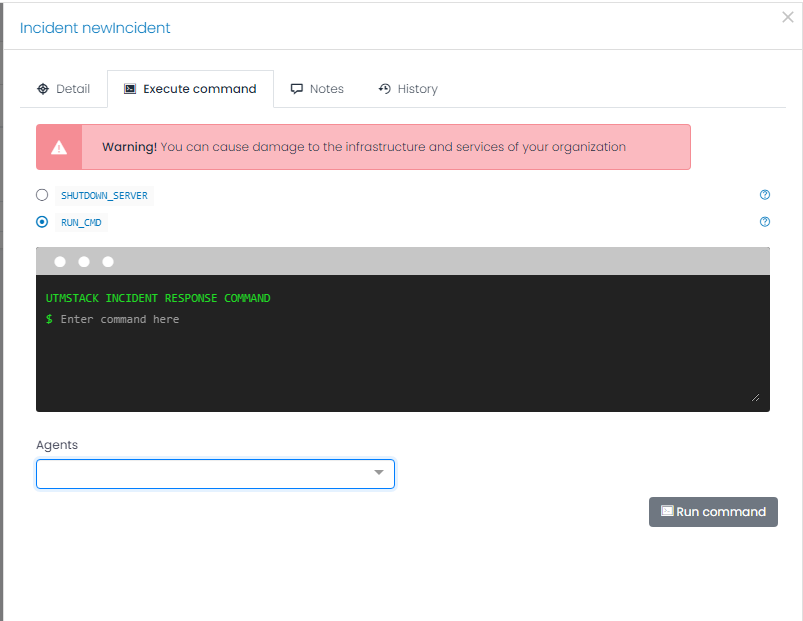
Step 7: Mitigate the Attack
Within the Incident View, review the details and evidence associated with the incident.
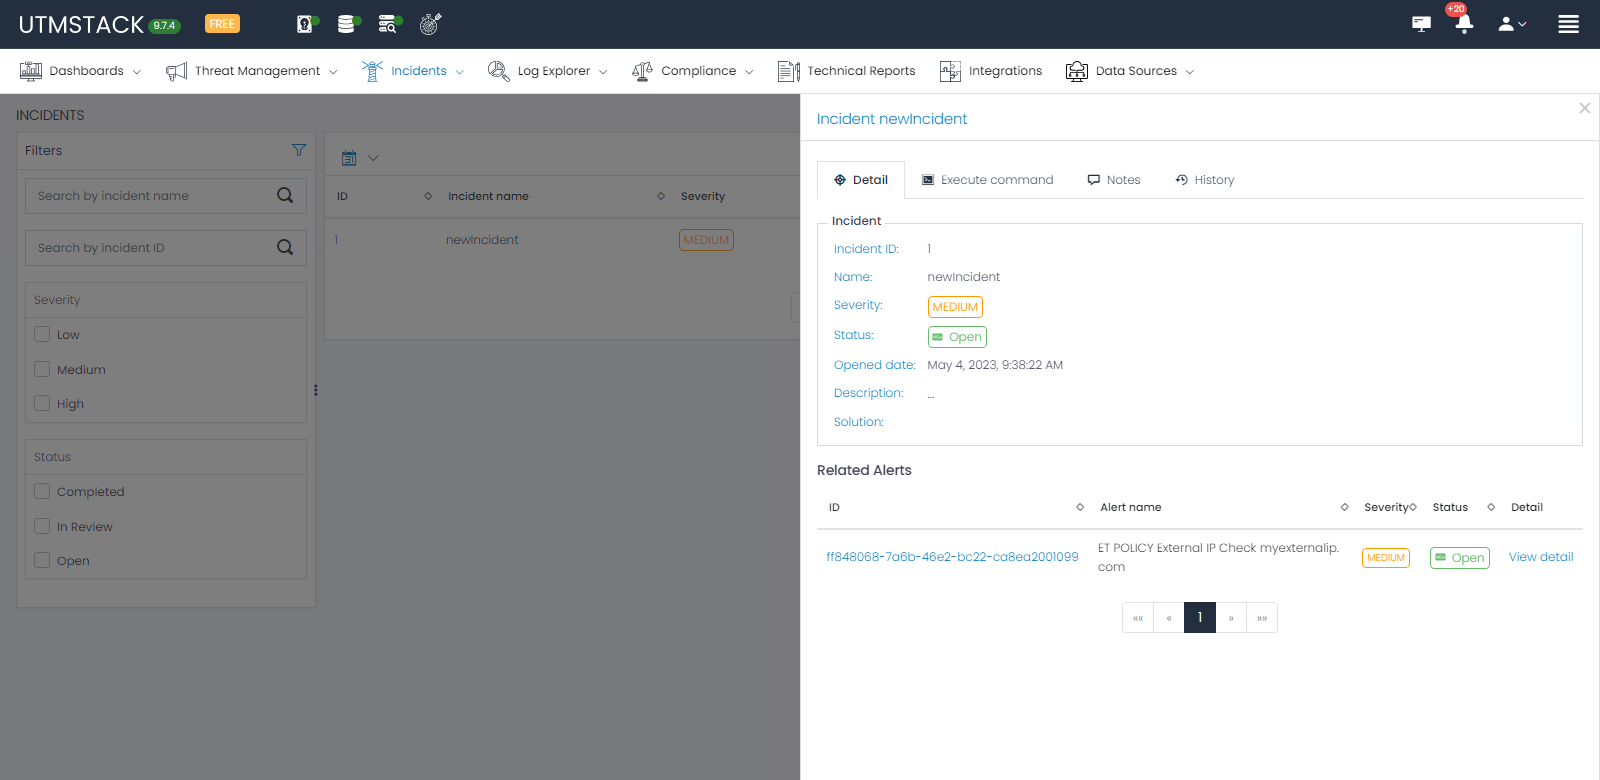
Take immediate and decisive actions to mitigate the ongoing attack based on the available information. One recommended approach is to initiate the shutdown of the compromised server as the default response. This action helps contain the threat and prevent further unauthorized access to your corporate systems. However, please consider your organization’s specific incident response procedures and consult with your security team to determine the most appropriate course of action in this situation.