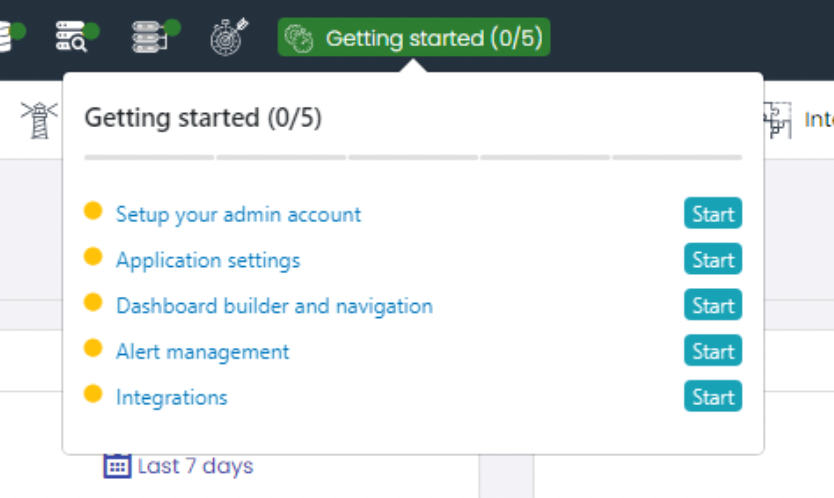
Getting Started Guide
Welcome! After logging in, you will be redirected to our ‘Getting Started’ screen, designed to help you begin with UTMStack. Here, you will find detailed information and clear steps to set up and start using our system effectively. We recommend you follow each of these steps carefully and use this guide to fully familiarize yourself with all the features and benefits that UTMStack offers. Begin your journey towards a more efficient and organized security management now!
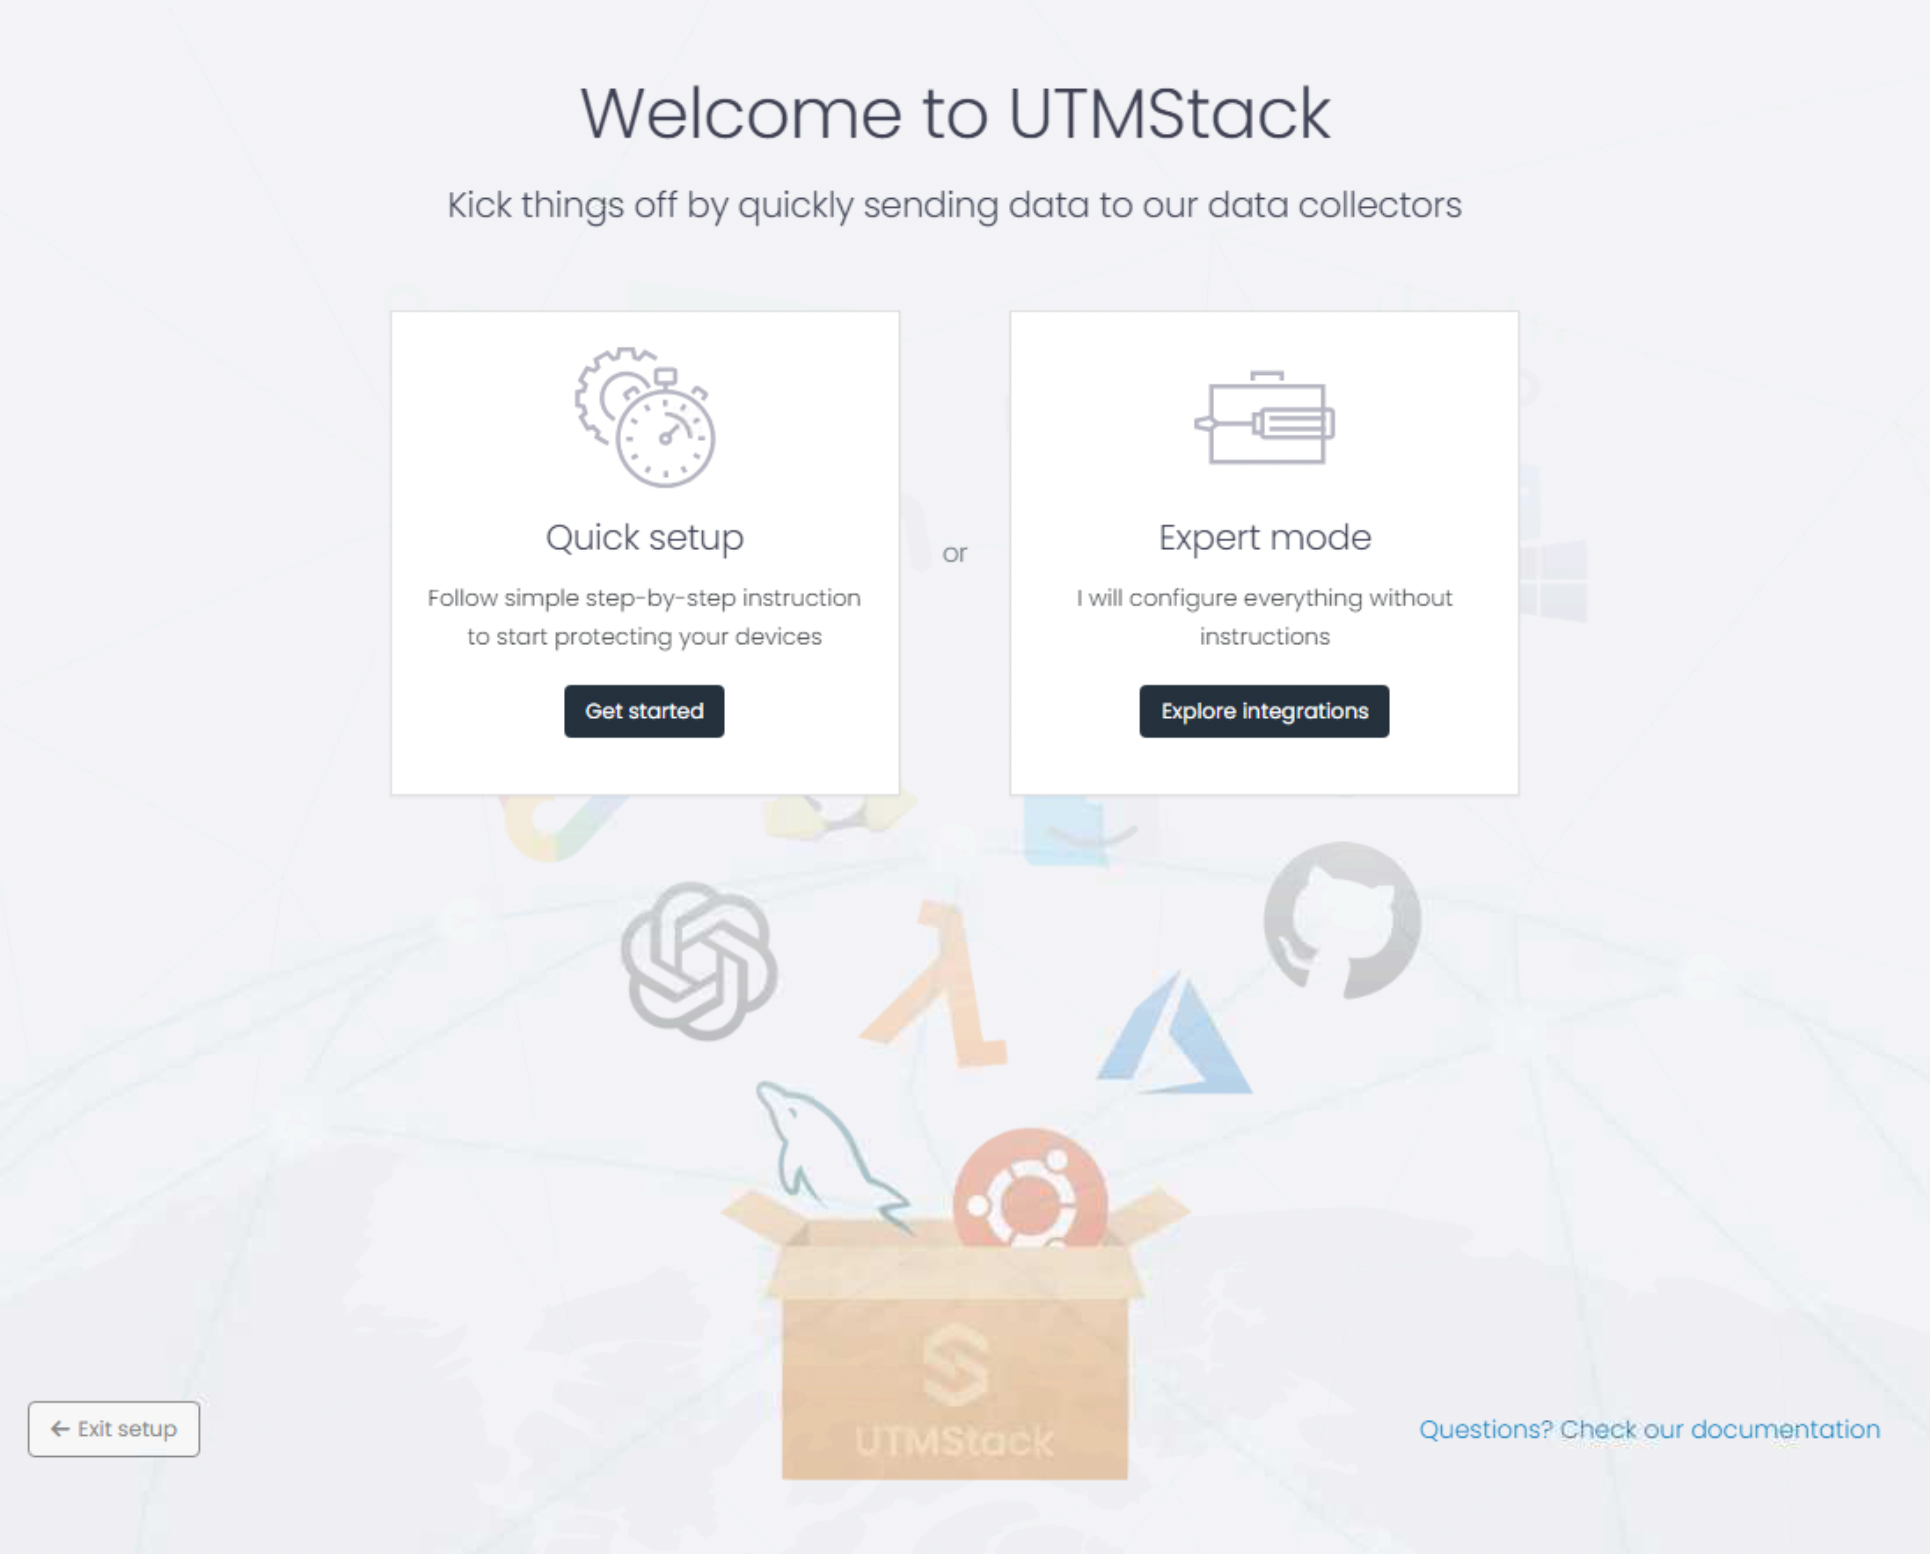
Click on the Get started button
- Set up your admin account: Set up your admin account.
- Application settings: Set up essential settings, including SSL and email configurations.
- Dashboard builder and navigation: UTMStack dashboards
- Alert Management: Alert management section.
- Integrations: Configure your first integration.
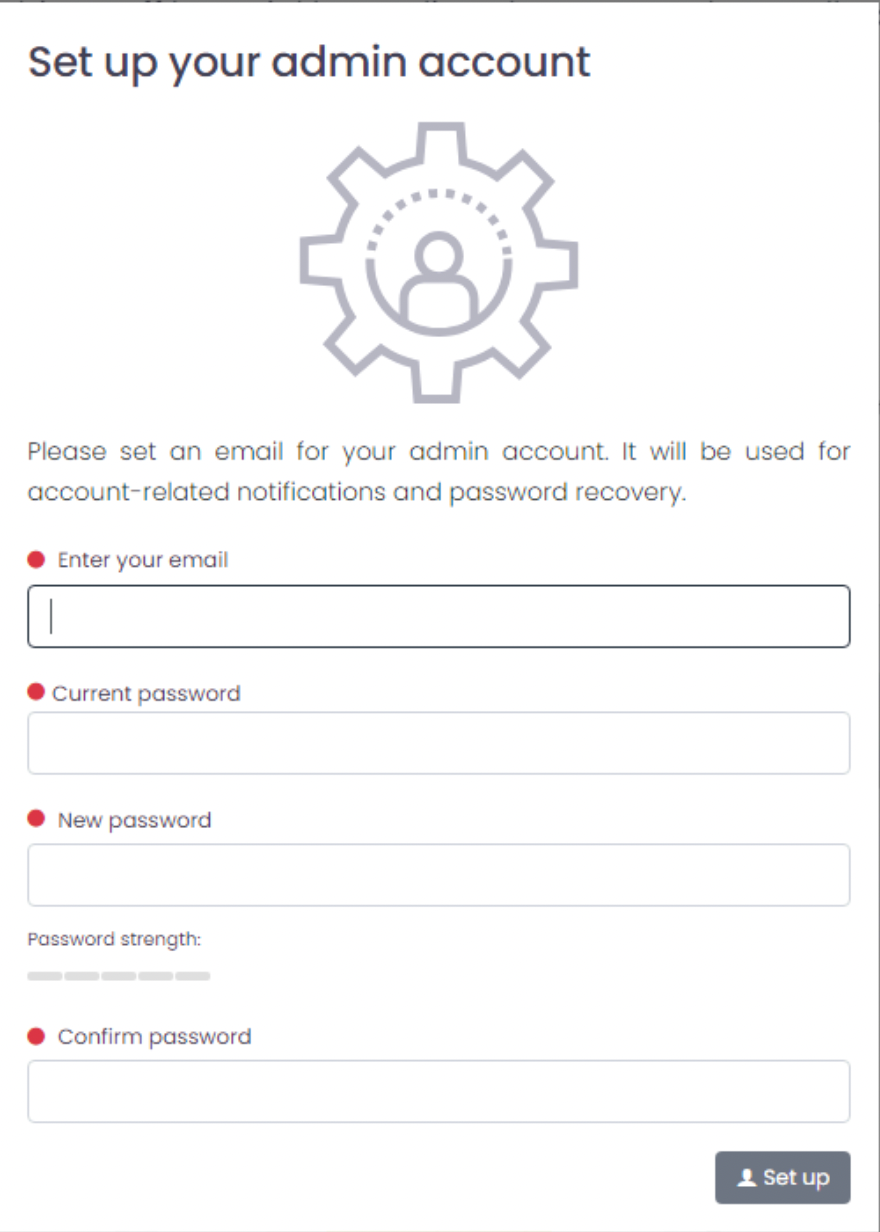
Set up your admin account
Configure your administrative account email to receive account-related notifications.
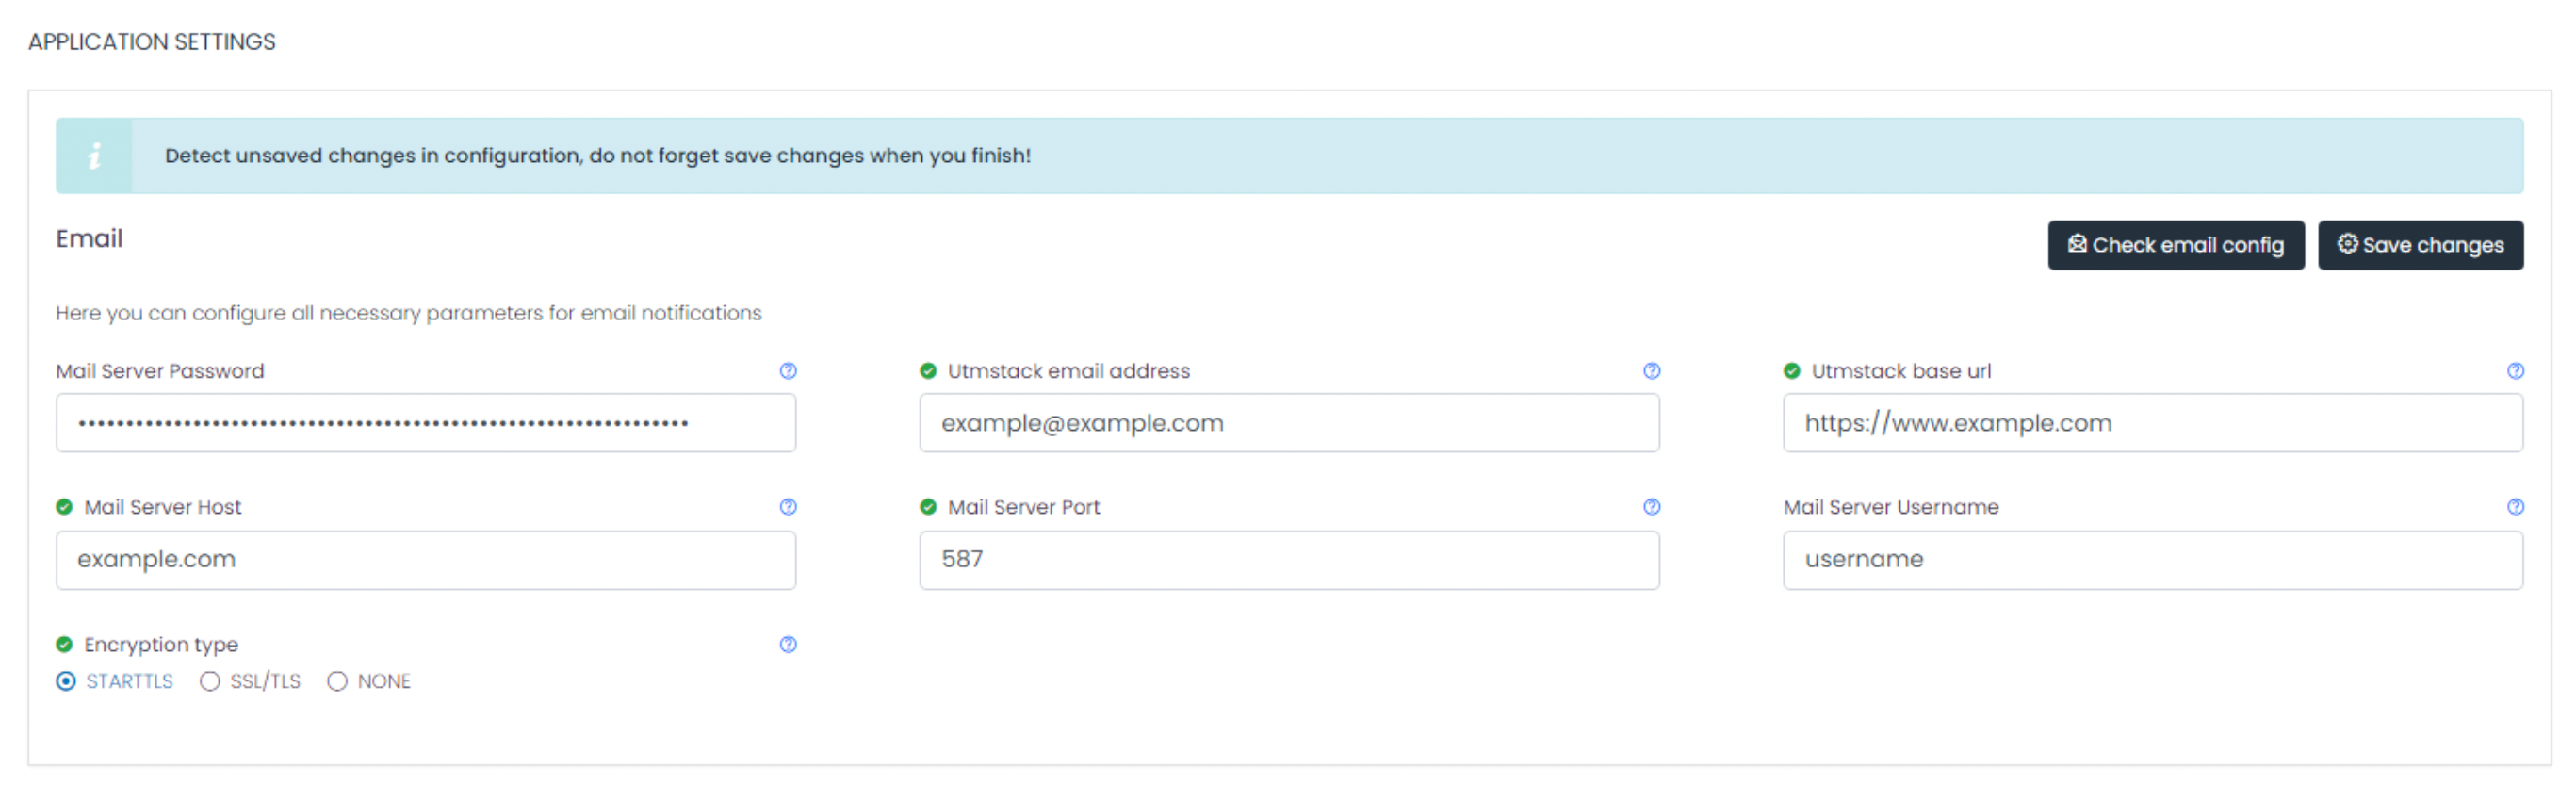
Application settings
- Mail server
Carry out these configurations correctly, as they are crucial for the security, effective communication, and overall operability of your online system or service. Ensure to carefully follow the specific instructions provided for each setting and verify their proper functioning once established.
- Alerts and Incidents
Here you can configure all the necessary parameters for the correct operation of alerts and incidents
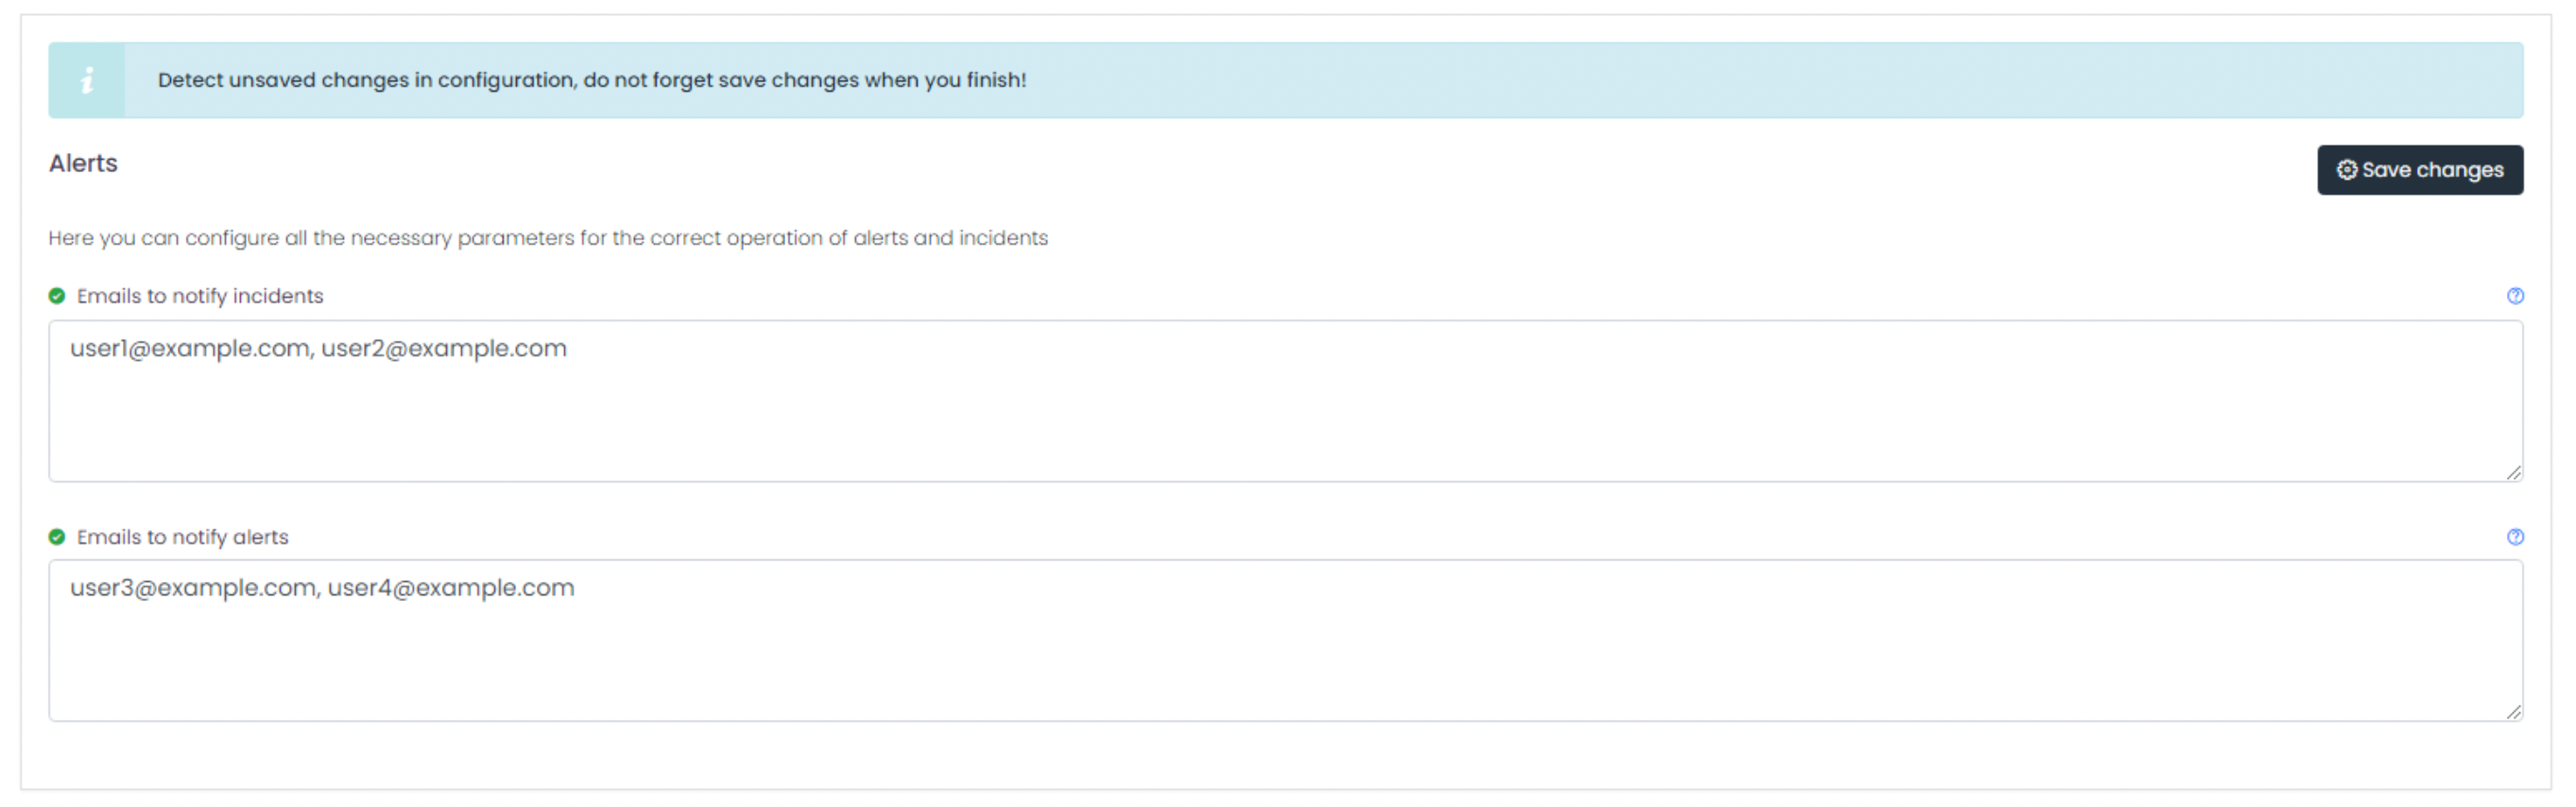
Important
Email users for alerts and incidents must be separated by commas.
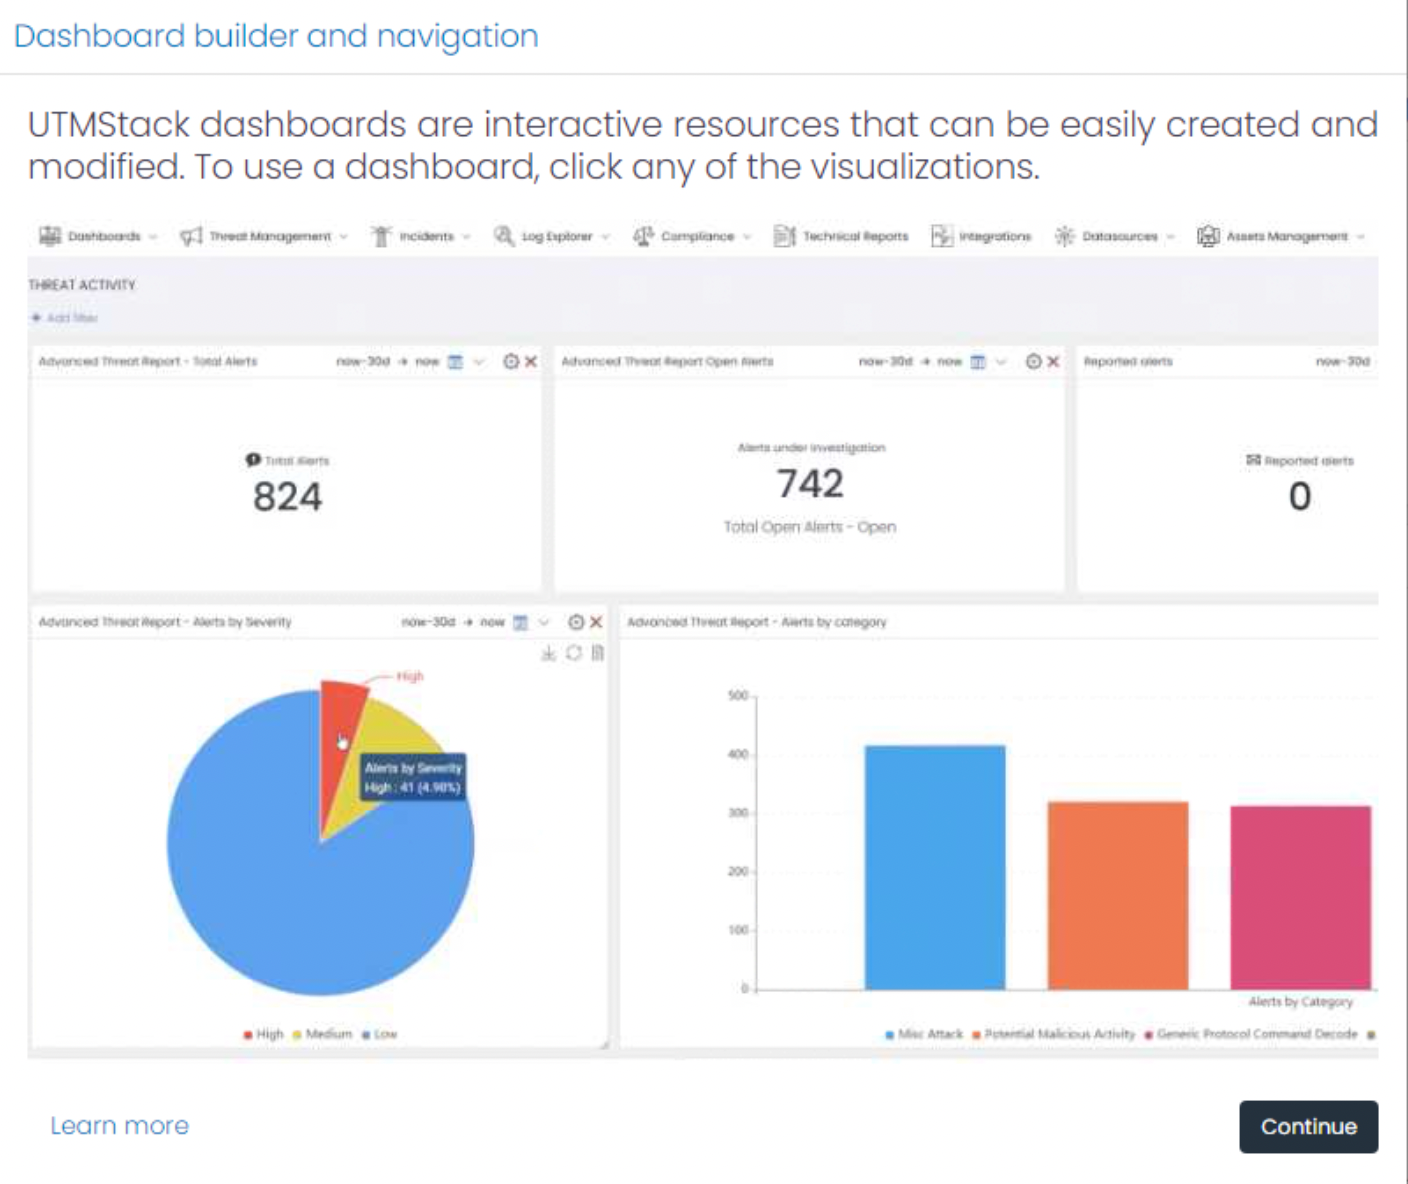
Dashboard builder and navigation
To begin using the UTMStack system, it is important to become familiar with the dashboards, which are interactive tools designed for easy creation and modification. These dashboards provide an intuitive interface that allows you to visualize and analyze data effectively. To leverage these tools, simply click on any of the visualizations present on the dashboard. By doing so, you will be able to interact with the data, which will help you better understand the information presented and make informed decisions based on it. The ability to modify and customize the dashboards means you can tailor data visualization to your specific needs, making it easier to gain relevant insights for your organization or project.
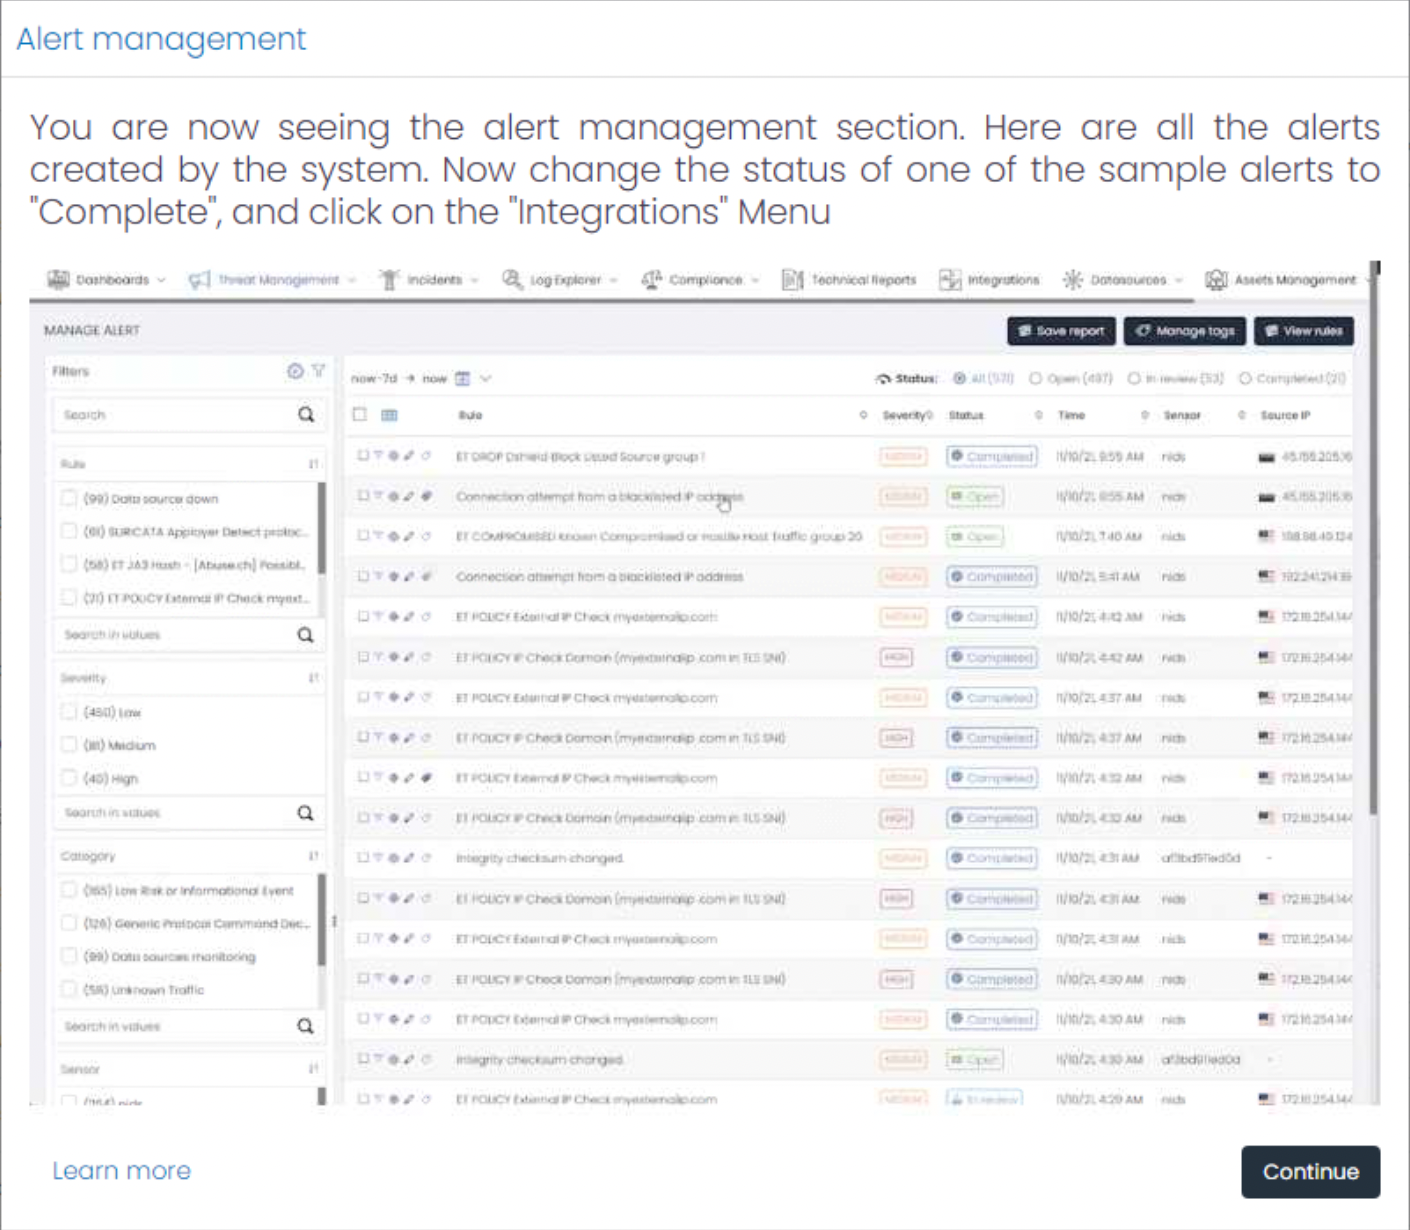
Alert Management
Alerts management section. Here, you will find all the alerts that have been created by the system. To proceed, change the status of one of the example alerts to “Complete”. After updating the status, click on the “Integrations” menu. This section allows you to effectively manage and respond to system-generated alerts, ensuring that each alert is addressed according to its current status. By navigating to the “Integrations” menu, you can explore more about how these alerts interact with other systems and processes within your organization, thus enhancing your overall security management strategy.
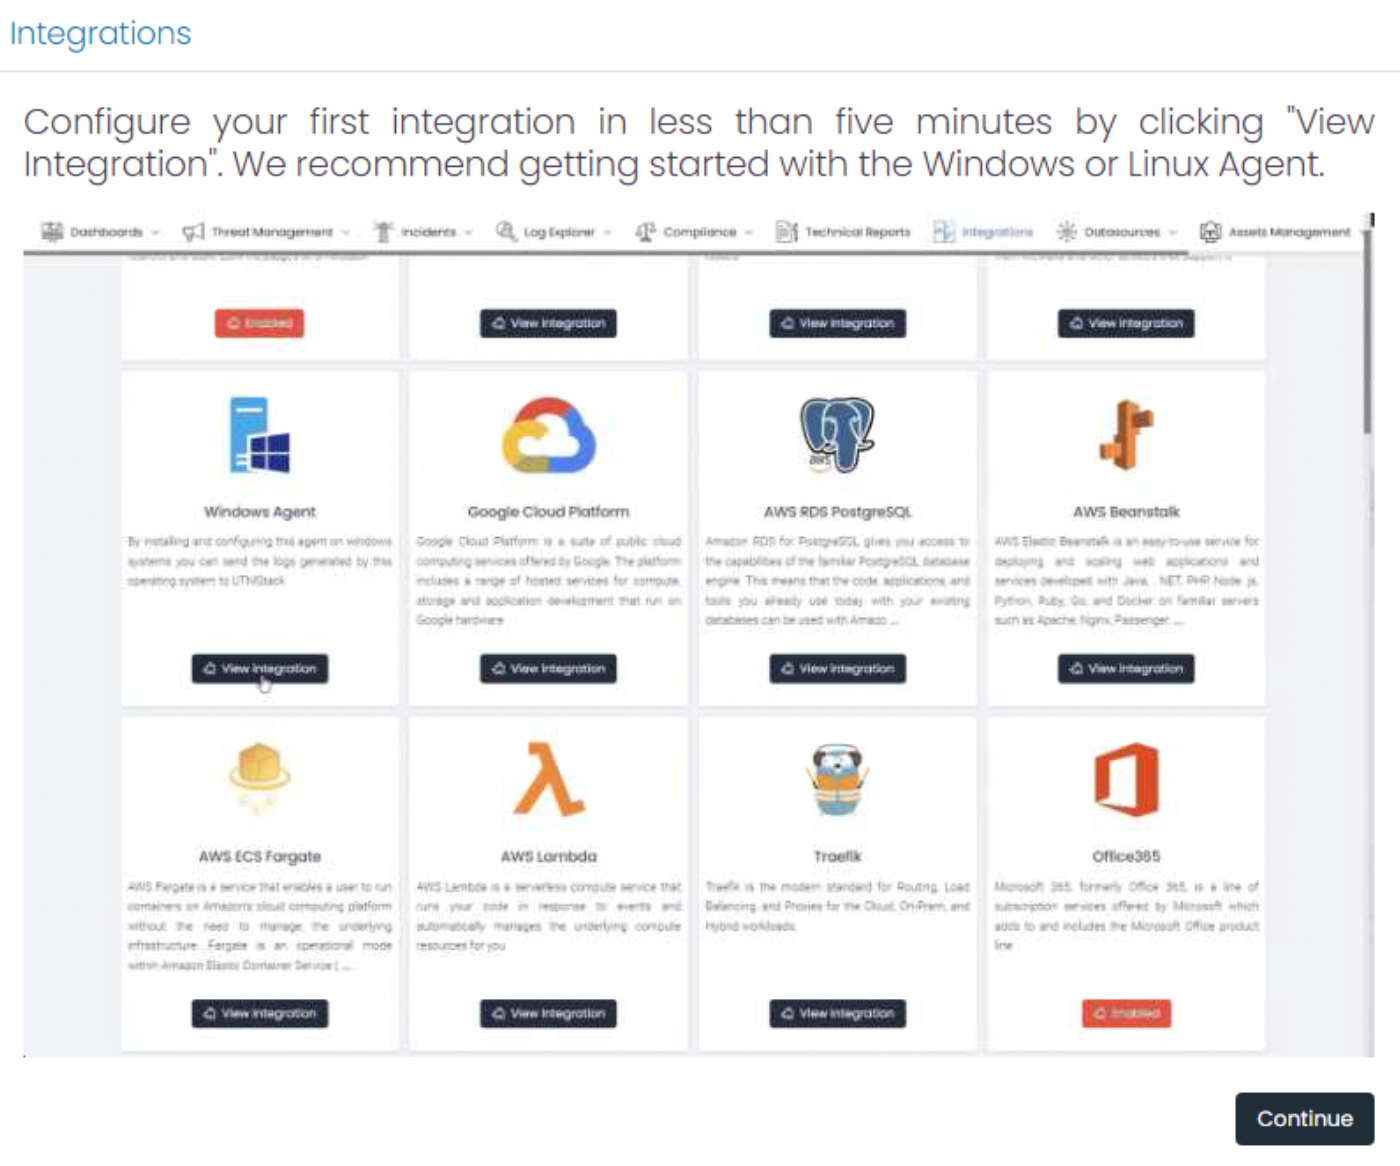
Integrations
Configure your first integration in less than five minutes by clicking “View Integration”. We recommend getting started with the Windows or Linux Agent.
Startup configuration menu
If you are in the UTMStack system and have not configured the above guide, you can view each step in the Getting Started menu above.